- Posts: 1386
7e/Ultimate7e, adding the devo version 4in1
- victzh
-
- Offline
Please Log in or Create an account to join the conversation.
- CesiumSalami
-
- Offline
- Posts: 51
Please Log in or Create an account to join the conversation.
- ridgerunner
-
- Offline
- Posts: 13
victzh wrote: Surely, you can demux chip select signal. I do exactly that in my version of 4in1 module. It also has SPI flash for TXs that lack it (Devo F series, Radiolink AT9). You need support in the code for it, it's almost done.
You can't reprogram MCU on the Banggood module - the author of this module is quite secretive and we don't know what is this. You definitely can try.
Are you saying that the Bangood 4-in-1 module for Devo is locked and cannot be reflashed?
How about the Banggood 4-in-1 TX module for Taranis/9XR/etc?
I currently have these in my shopping cart, but if they can't be upgraded then I will be looking to buy elsewhere!
Please Log in or Create an account to join the conversation.
- HappyHarry
-
Topic Author
- Offline
- Posts: 1136
perhaps you have read that the second module you linked is programmable, but in fact it's only the daughterboard that can be reprogrammed to add protocols etc not the 4in1, also the devo version doesn't need this prorammable daughterboard as the tx handles all that
Please Log in or Create an account to join the conversation.
- ridgerunner
-
- Offline
- Posts: 13
I was hoping to buy the Banggood modules and reflash them with code that supports the S-FHSS protocol (I think it uses the CC2500 chip). If I am understanding you correctly, neither of the two Banggood modules I linked to can be re-flashed to do this. Yes?
Thanks for any help with this!
Please Log in or Create an account to join the conversation.
- victzh
-
- Offline
- Posts: 1386
Please Log in or Create an account to join the conversation.
- hexfet
-
- Away
- Posts: 1952
Please Log in or Create an account to join the conversation.
- ridgerunner
-
- Offline
- Posts: 13
As a long-time software engineer (36+ years working with low level ASM, C and Fortran) I can really appreciate what you devs have done hear, particularly PB's efforts. Anyone know how I could send him some $$ to help out the cause?
Cheers! (and thanks again)
Jeff Roberson
Salt Lake City, UT USA
EDIT: I see in the FAQ that donations are not accepted. However, I want to send him some $$ anyway as a "Thank you" for the work he has already done - is this possible?
Please Log in or Create an account to join the conversation.
- SuperFLY
-
- Offline
- Posts: 10
Please Log in or Create an account to join the conversation.
- CesiumSalami
-
- Offline
- Posts: 51
I'm flying both on a Devo 7e with a 4-in-1 added.
Another note is: I really like the Beecore FrSky. But. The FuriBee equivalent ... is cheaper and it sounds like it may have RSSI and VBAT supported. I haven't heard a lot about it. I have one in the mail. You can check out the thread on RCGroups for updates. People are just starting to get it.
www.rcgroups.com/forums/showthread.php?2...p-Inductrix-JJRC-H36
Please Log in or Create an account to join the conversation.
- SuperFLY
-
- Offline
- Posts: 10
Please Log in or Create an account to join the conversation.
- timps
-
- Offline
- Posts: 6
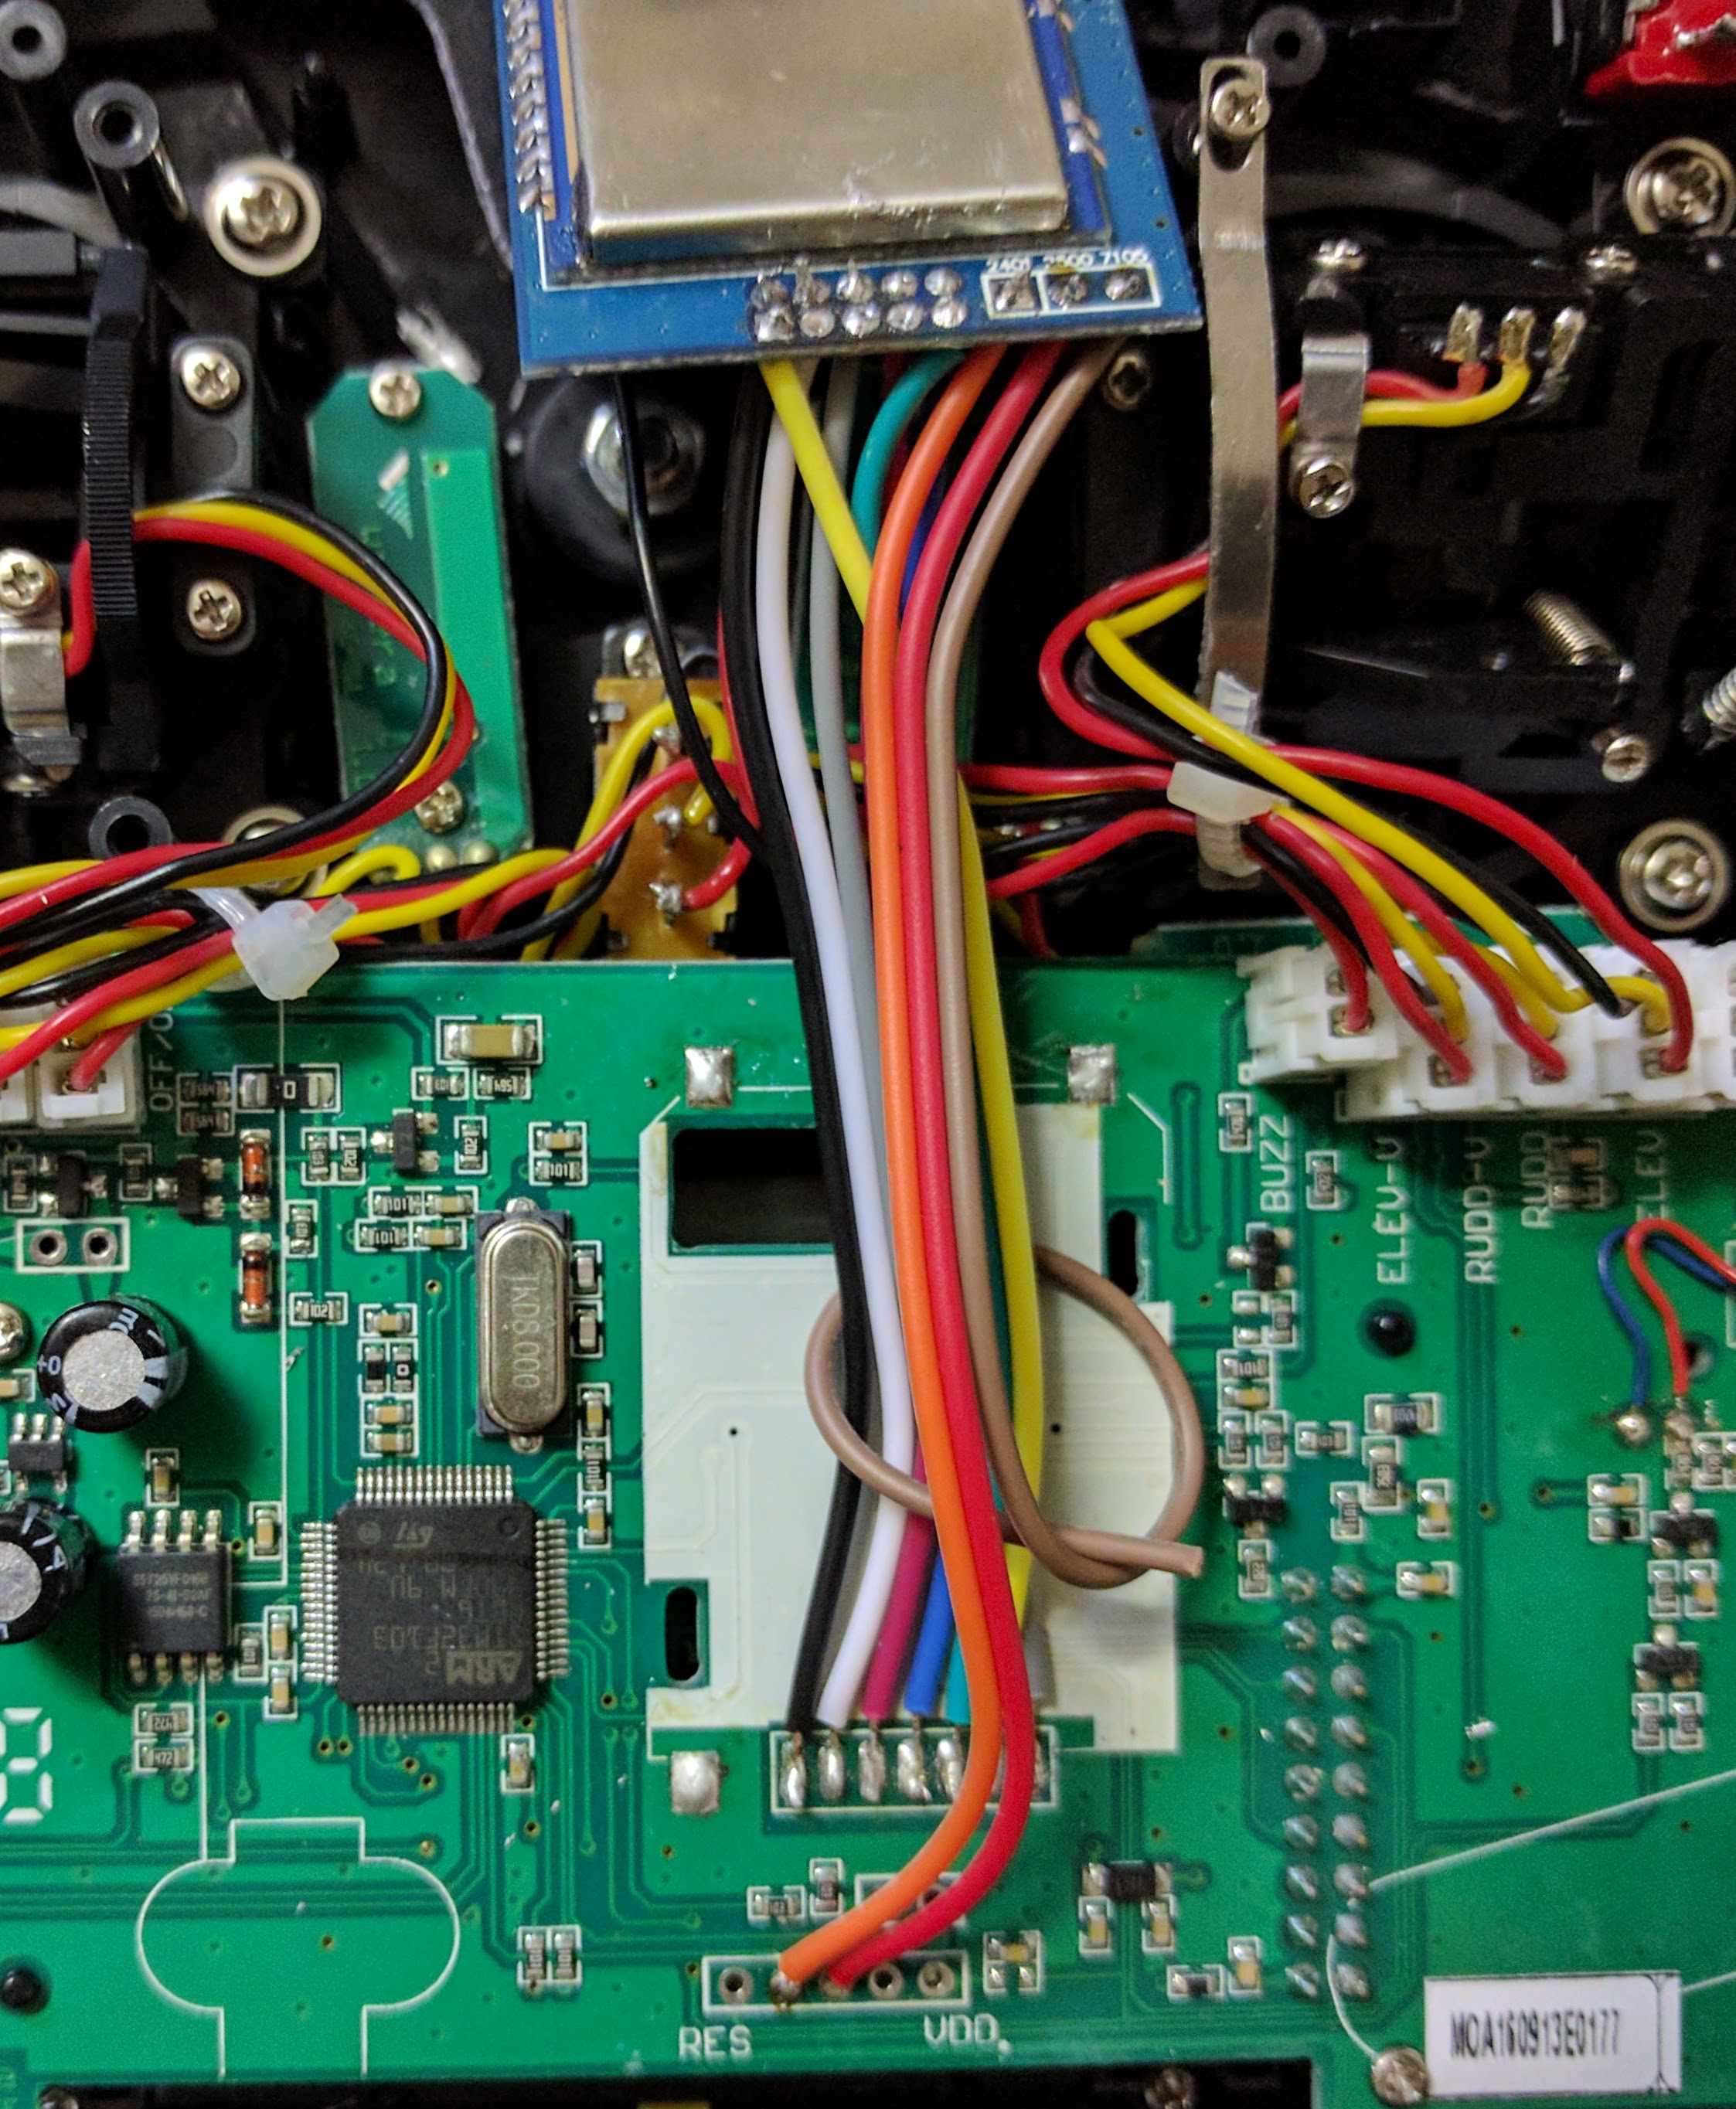
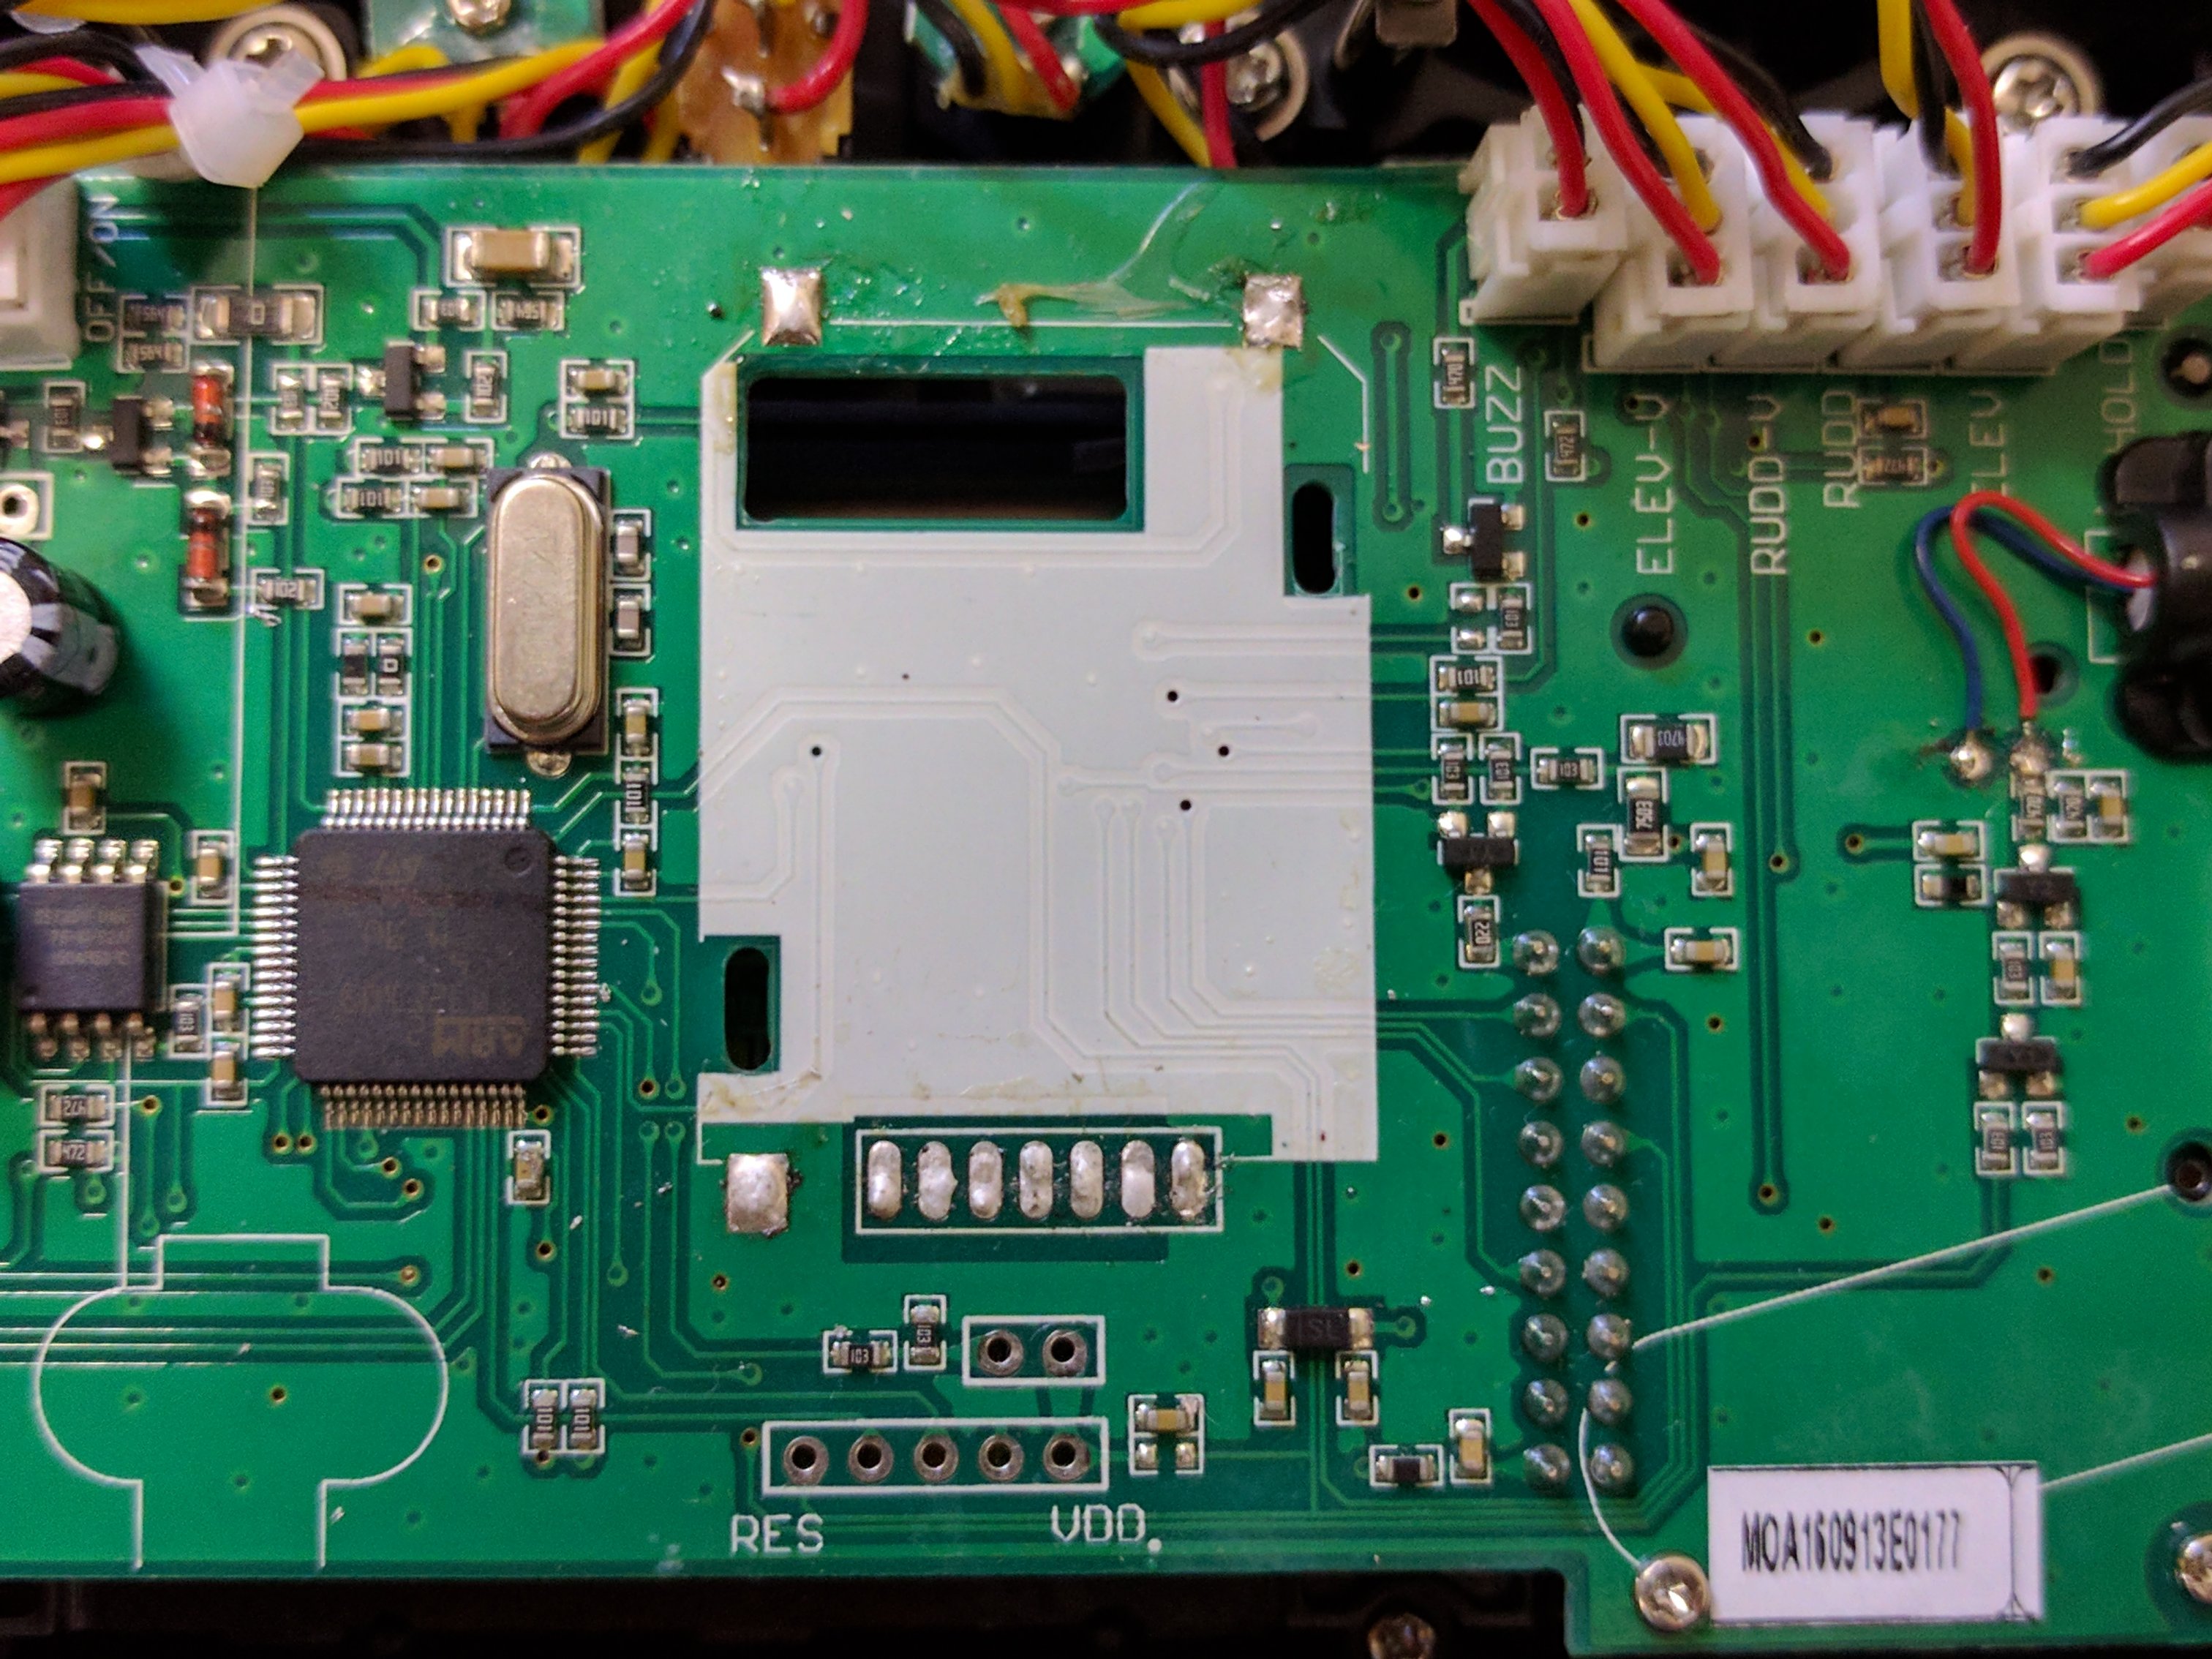
I tried to solder the 4-in-1 (using only 3 protocols) to my otherwise stock Devo 7e today, but now it won't turn on
How can I troubleshoot the problem? I checked for shorts (none) and I don't think I lifted any of the solder pads (original module came off quite well with some patience). Is there any information which voltages I should observe on the pins?
Should the Devo turn on without a module (or would it damage anything powering it on without one)? Should I try to solder the original module back in in case the banggood module is faulty? I tried the 4-in-1 without any of the additional modules (the three separate pins) but it did not change anything.
Thx!
Please Log in or Create an account to join the conversation.
- CesiumSalami
-
- Offline
- Posts: 51
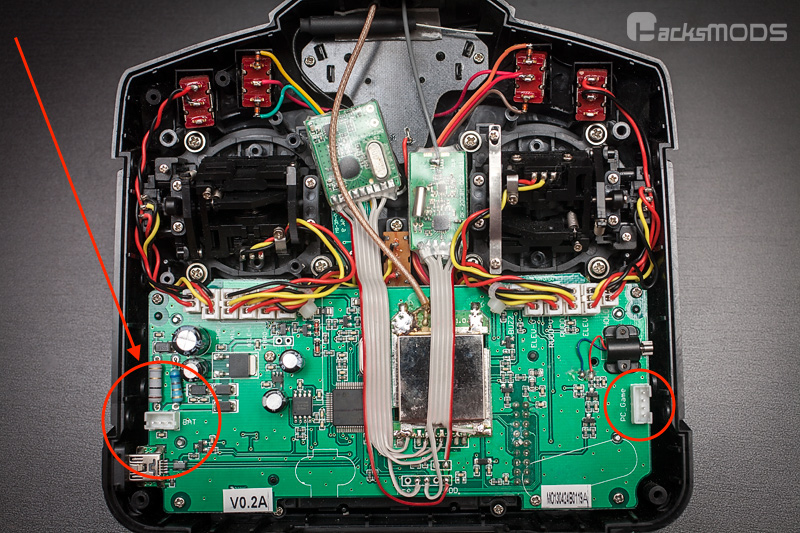
I'm just going to ask the obvious question - you're sure you double checked when reassembling that you inspected and plugged in both connectors that are present when you separate the front of the Tx from the back? and double checked that the batteries are well seated, etc... ?
Specifically the one with the arrow in the pic attached
Please Log in or Create an account to join the conversation.
- hexfet
-
- Away
- Posts: 1952
But that doesn't explain why it's not powering up...
Please Log in or Create an account to join the conversation.
- victzh
-
- Offline
- Posts: 1386
Please Log in or Create an account to join the conversation.
- timps
-
- Offline
- Posts: 6
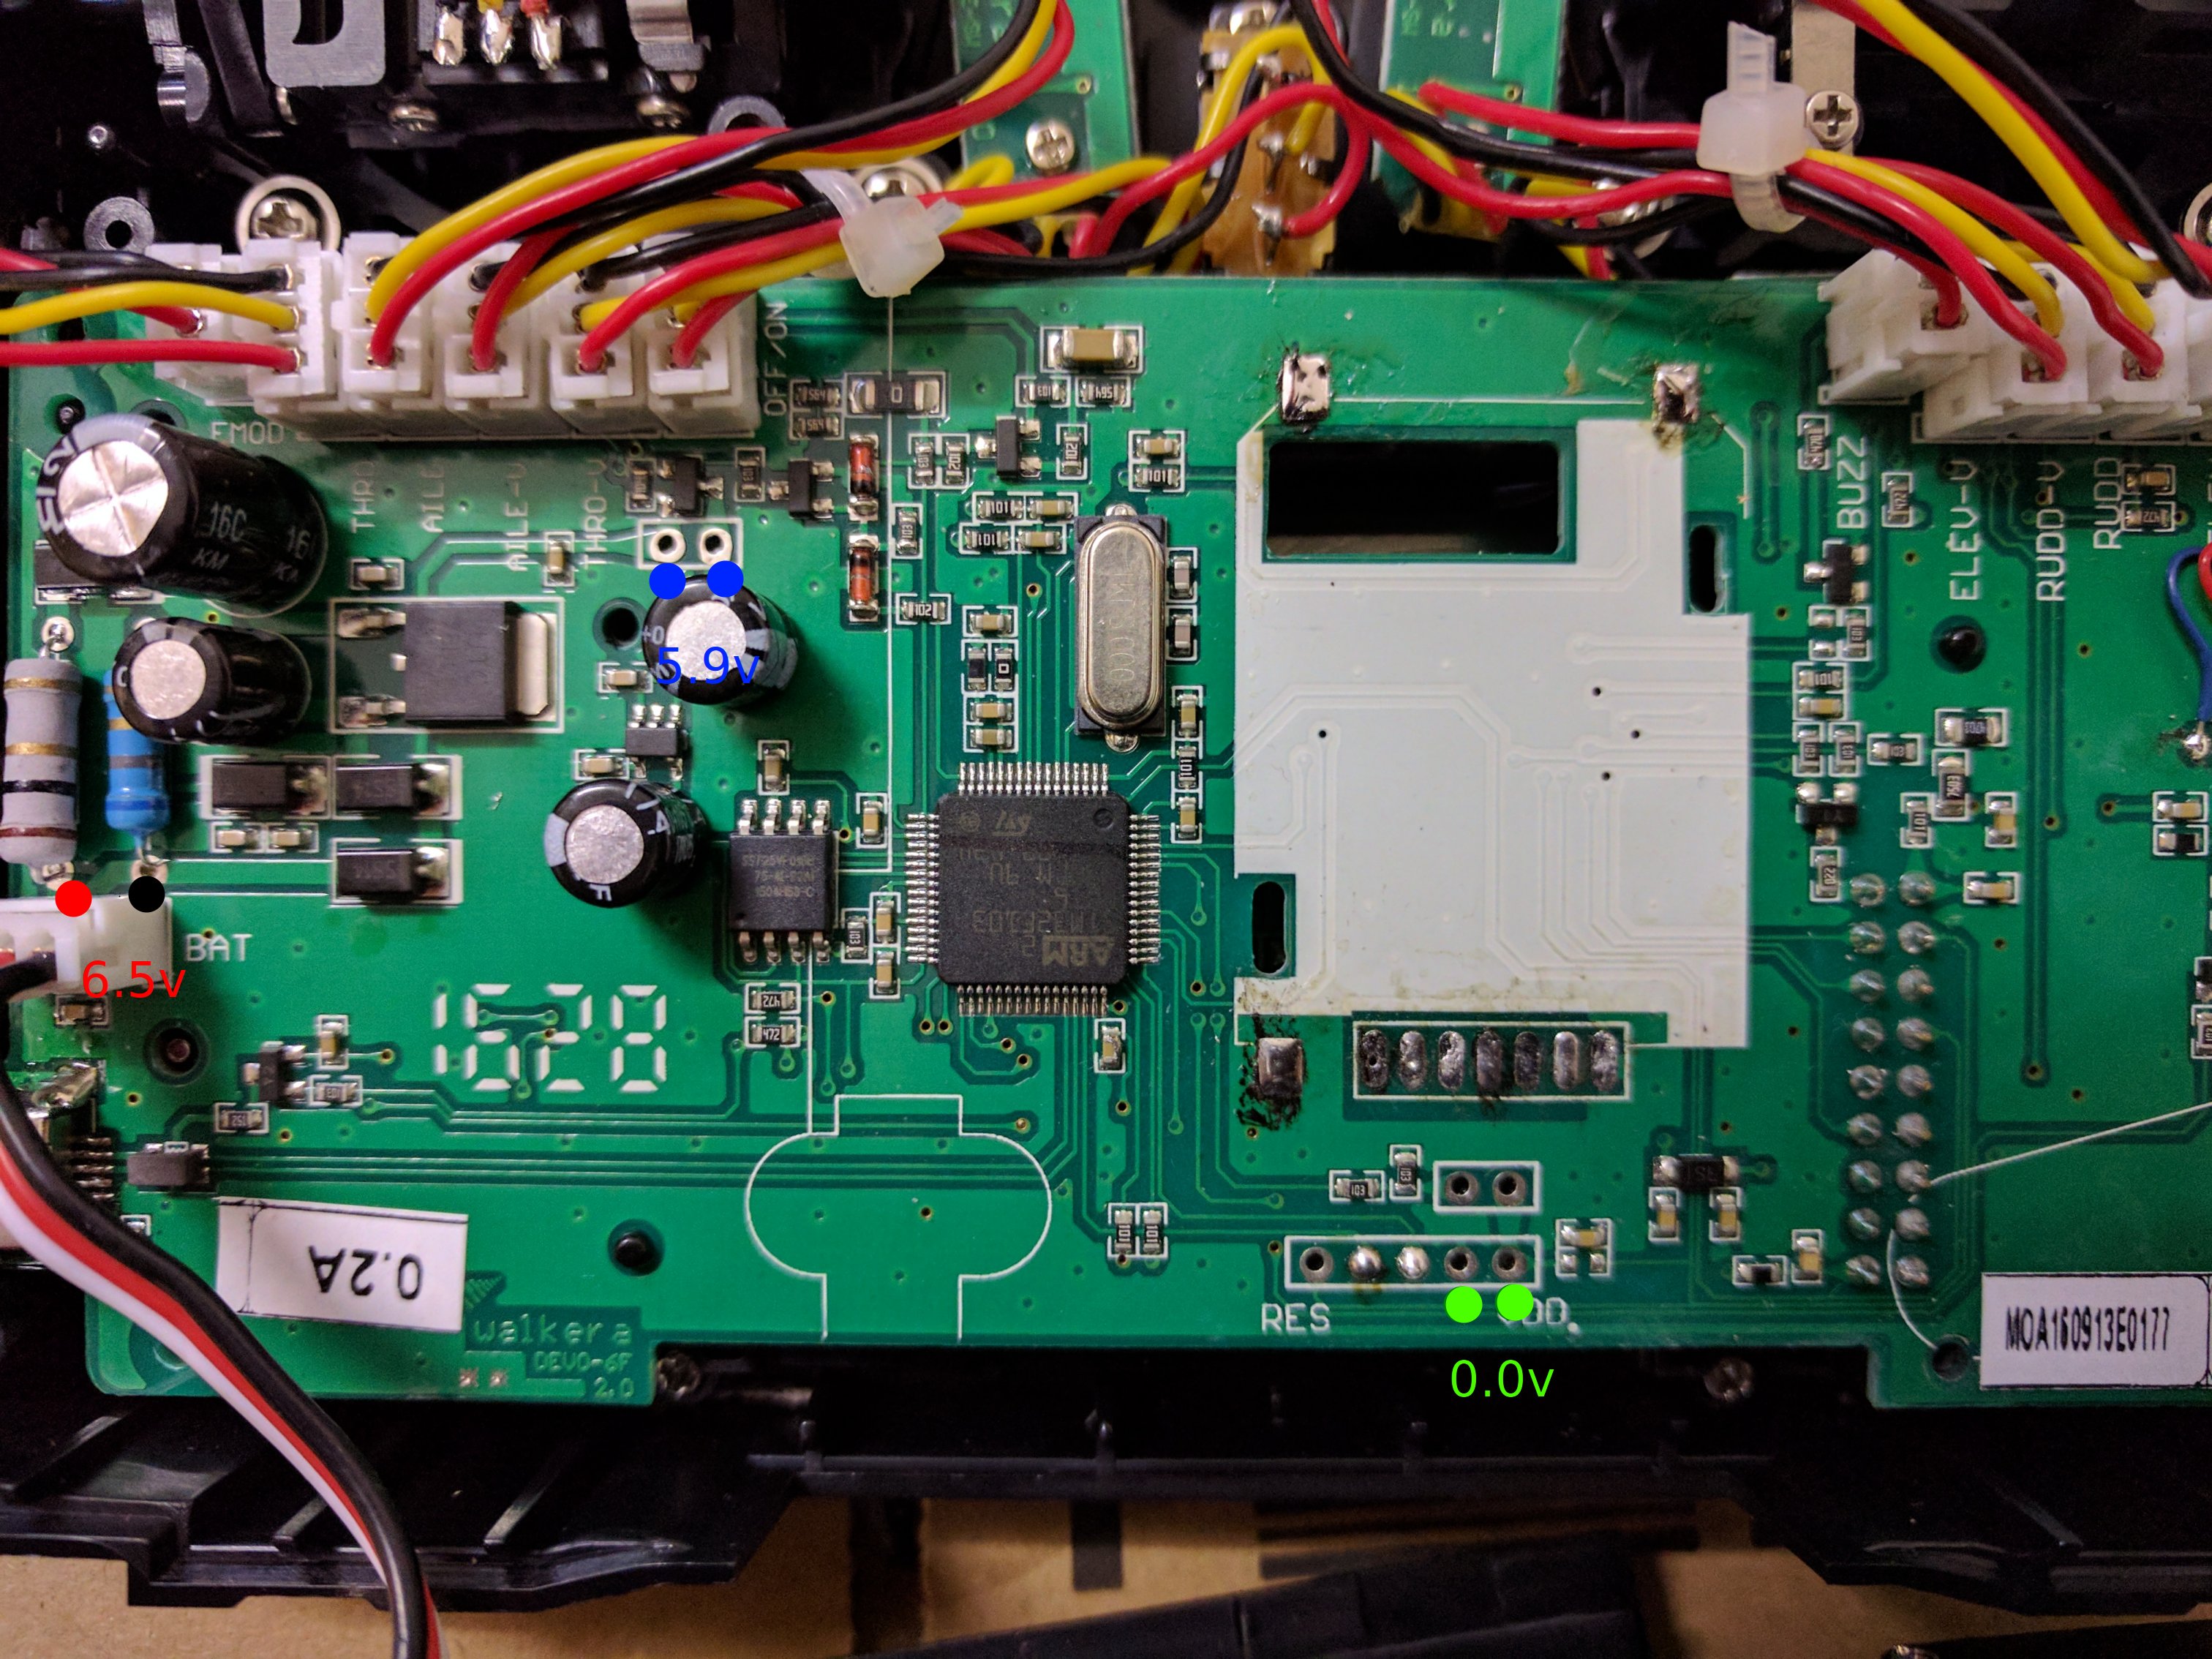
However, I noticed that VDD and GND seem to be shorted. Using new batteries I measured the following voltages (see attached picture). I'm also getting a beep on the multimeter when checking for connections between the two bright green spots.
Edit: I'm also only measuring 0.5v between PIN 6 and 7 on the module contacts, shouldn't it be 5v? /edit
I could not find any visual signs for connections between GND and VDD, also never soldered anything to those points directly, so it must have happened somewhere else?
Regarding leaving 7105 unconnected: two posts on the previous page mention leaving it unconnected without problems.
Please Log in or Create an account to join the conversation.
- dabiz
-
- Offline
- Posts: 6
Also nice work removing the old module cleanly...mine did not go as nicely. I dont have a dmm with me or I'd check the voltages for you
Please Log in or Create an account to join the conversation.
- dabiz
-
- Offline
- Posts: 6
I lifted 2 pads. I superglued them back in position and managed to connect them to the vias with a lot of solder. My NRF and CYRF modules seem to be working with a Eachine E010 and LemonRX DSM2. I don't have any other RXs to test with.
In regards to hardware.ini, I enabled the NRF, C2500, and a7105 and switched the ports to match my wiring. I saw a couple posts on RCgroups where people enabled the CYRF module but I didn't as the notes indicate it is unneccessary.
Thanks for everyone's help with this. I still plan to add 2 3-position switches. In case anyone else is interested in adding switches Arrow Electronics has free shipping right now.
Please Log in or Create an account to join the conversation.
- timps
-
- Offline
- Posts: 6
dabiz wrote: I see a goober of solder on the cap next to pin 64 of the uC (I think...not sure why the datasheet doesn't show the orientation dot) which happens to be Vdd. Is it bridged?
That was it! Thanks so much! Next time I'll cover everything that I'm not working on
dabiz wrote: Also nice work removing the old module cleanly...mine did not go as nicely. I dont have a dmm with me or I'd check the voltages for you
Thanks. It took quite some time mixing in some lead based solder at high temperature to the big ground blobs and removing it with a solder sucker. Then I was able to lift it a bit at the top. There was no glue below my module, just some flux. Heating the bottom ground blob and all pins (going left <-> rigtht) I was able to lift it at the top slowly and then pull it off without any damage.
Will report back once the module is back in and some final picture
Please Log in or Create an account to join the conversation.
- Poundra
-
- Offline
- Posts: 1
It was much easier to remove the old module with Chip Quick Alloy. I start from top of the module slowly lifting it up millimeter by millimeter while using little bit of Chip Quick Alloy to keep the temperature low. My soldering iron is set to 280 degree Celsius. Once I have top part of module free it was pretty easy to removed the rest with flux and Chip Quick.
Please Log in or Create an account to join the conversation.


